Creating a session
Sessions → New session opens a five-step wizard. Each step asks exactly one question, and the running total is always visible on the right, so nothing about the price is a surprise at the end.
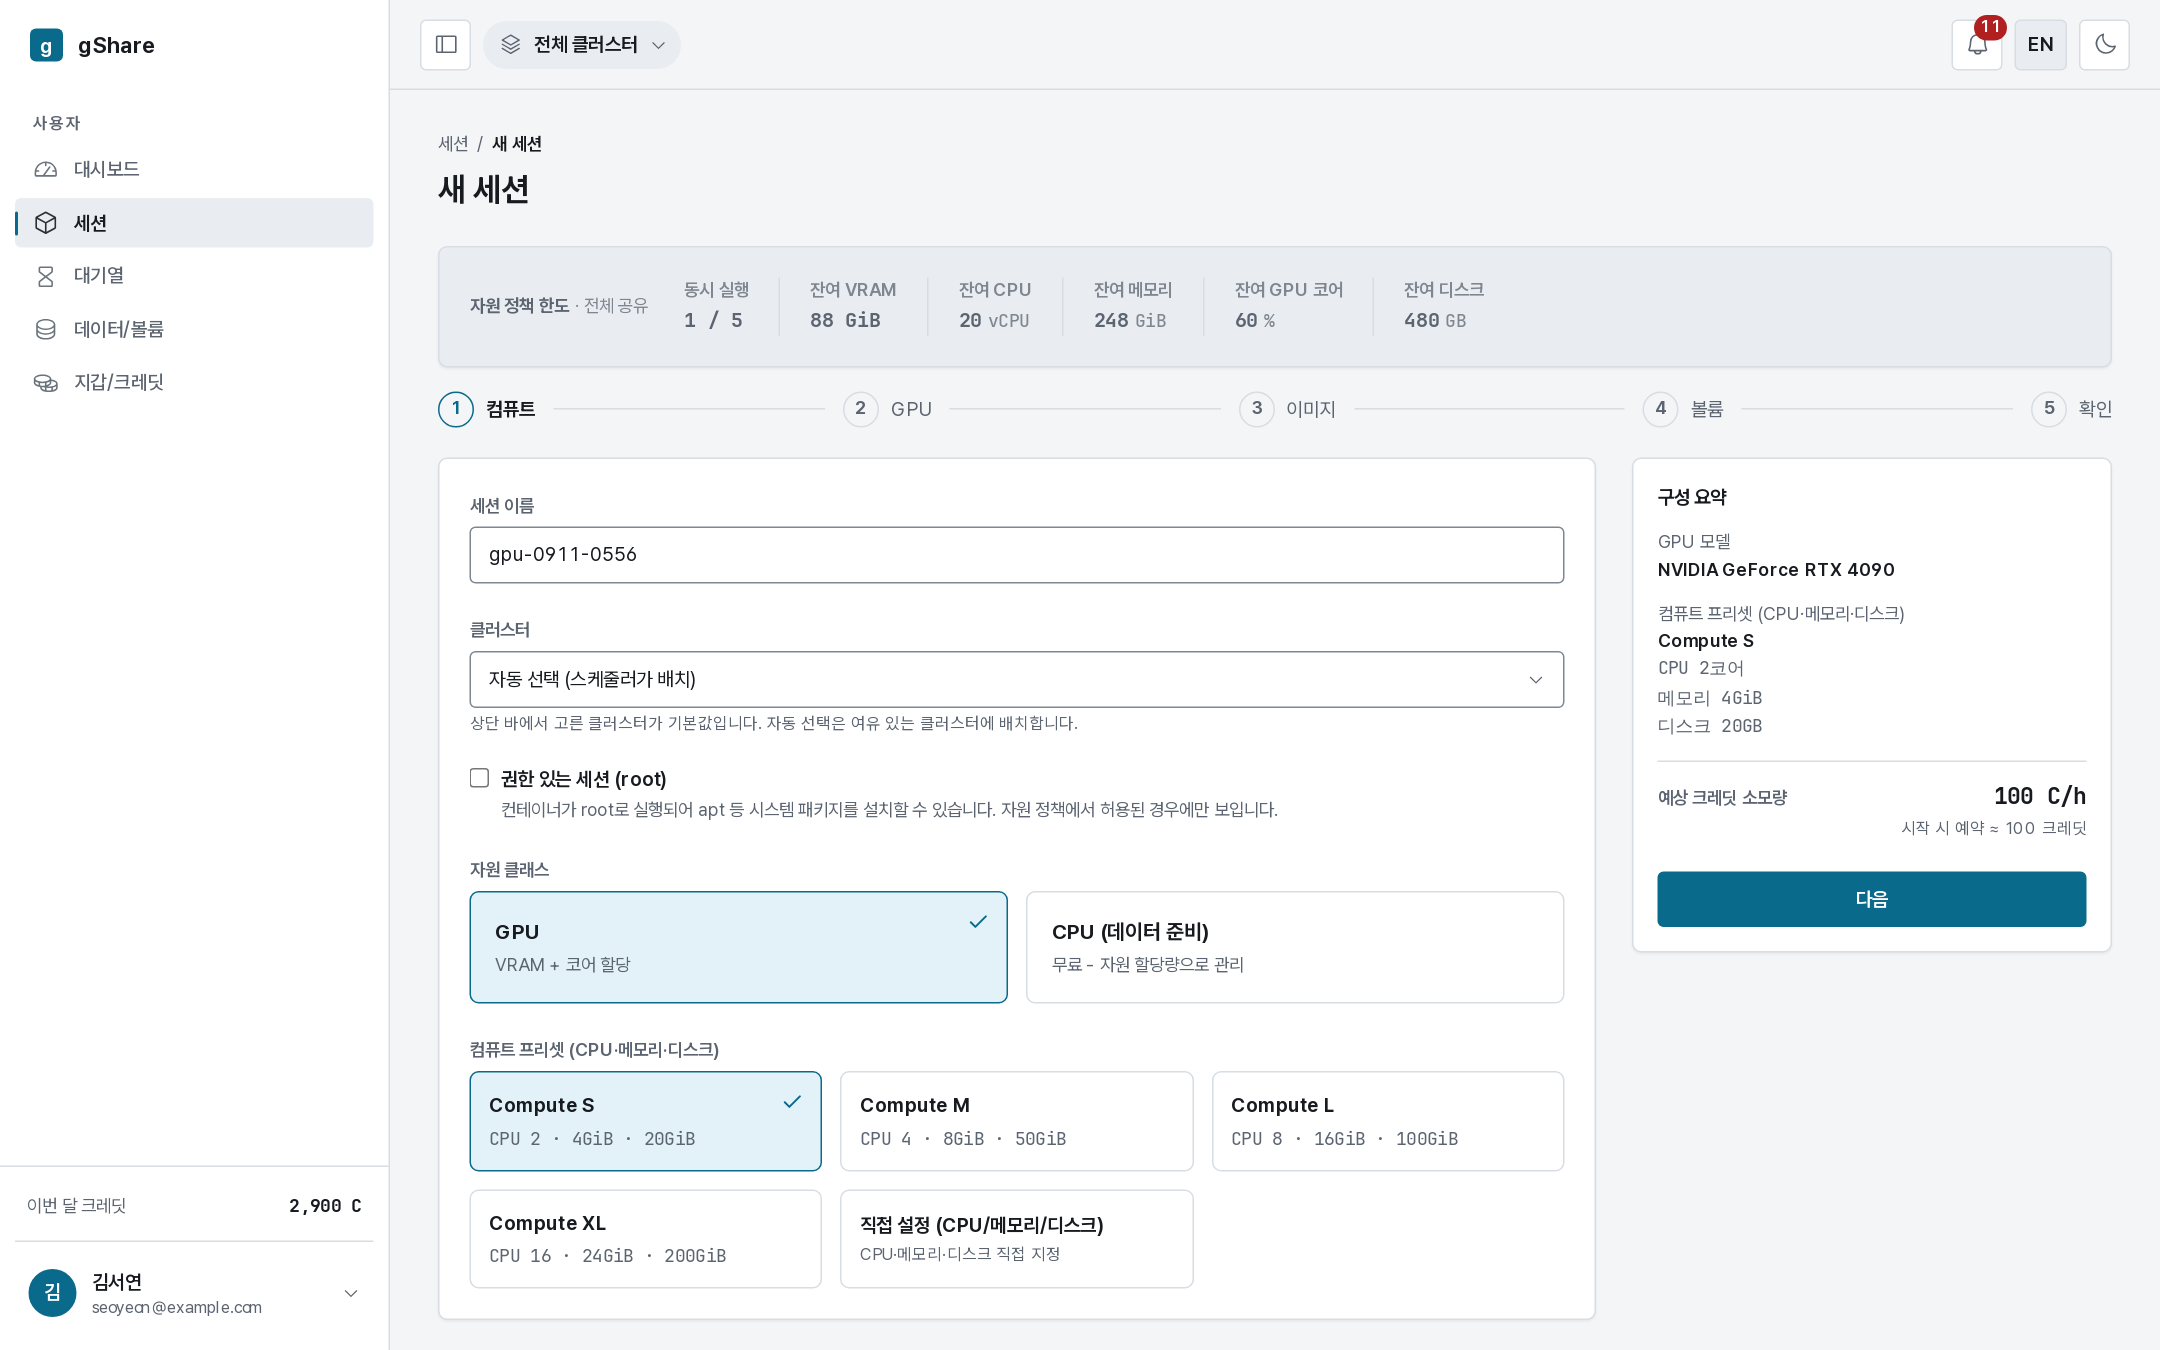
Before you start: your limits

The band above the wizard is your resource policy: how many sessions you may run at once, and how much VRAM, CPU, memory, GPU cores, and disk you have left after the sessions you are already running. A tier that would exceed one of these is offered but marked, so you find out here rather than at the end.
When the concurrency limit is reached the band turns red and the wizard says so: end or pause a session first, or ask your administrator for a higher limit from the dashboard's Request increase.
The step indicator

Five steps for a GPU session. Choosing CPU as the resource class removes the GPU step — four steps, and no credits.

Step 1 — Compute
Name

A name is suggested (gpu-MMDD-HHMM). Replace it with something you will recognize in a list a
week from now — resnet-finetune beats gpu-0911.
Cluster

Automatic lets the scheduler place the session on whichever cluster has room. Pick a specific cluster when your data is there: a volume lives on the cluster where it was first mounted, and a session that mounts it is placed on that cluster. On a single-cluster installation you can ignore this.
Privileged session
Visible only if your policy allows it. It runs the container as root, so apt install works
inside the session. Leave it off unless you need it.
Resource class

- GPU — VRAM and GPU cores are allocated, and the session is billed while it runs.
- CPU (data preparation) — no GPU at all. Free, and bounded by your policy's CPU-session limits. Use it for downloads, preprocessing, and anything that does not need a card.
Compute preset
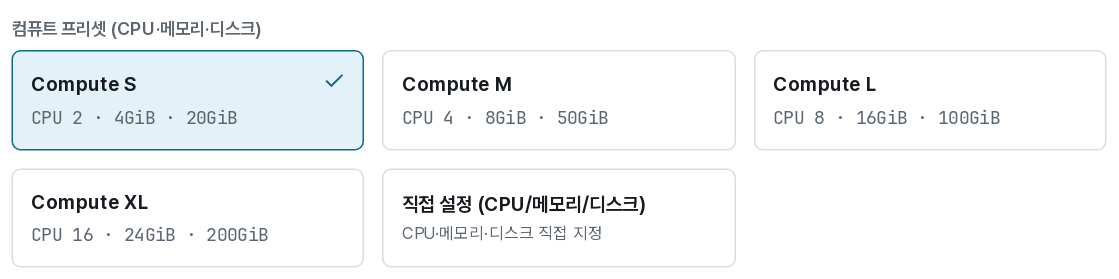
The preset is the CPU, memory, and scratch disk of the container — independent of the GPU choice. The seeded catalog runs from Compute S (2 vCPU · 4 GiB · 20 GiB) to Compute XL (16 vCPU · 24 GiB · 200 GiB); your site may have its own.
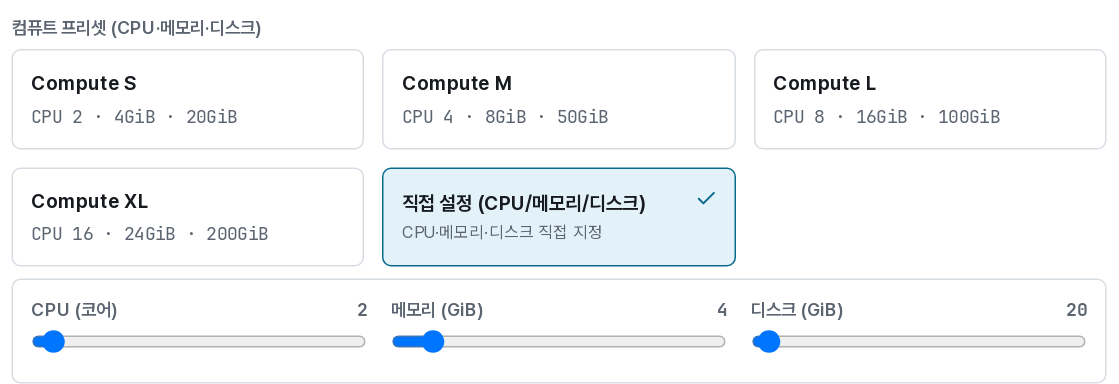
Custom replaces the tiles with three sliders — CPU up to 32 cores, memory up to 32 GiB, disk up to 500 GB. The sliders stop at what one node can realistically give: asking for more than a node has only puts the session in the queue.
The disk in the preset is the container's own scratch space. It disappears when the session ends. Anything you want to keep belongs on a volume.
The order summary
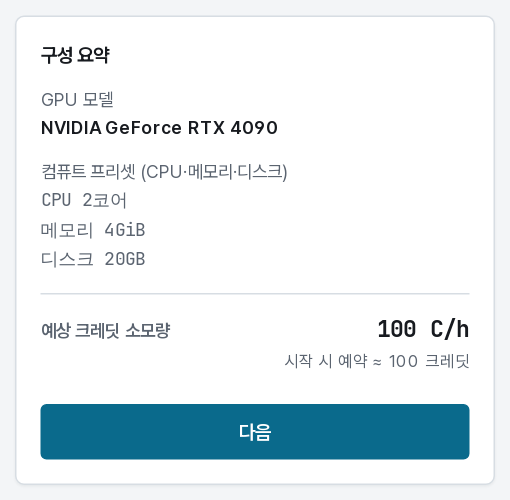
The right-hand column follows you through every step: the GPU model and tier, the compute preset, the image, the volumes, and the estimated credits per hour with the amount held when the session starts. It is the same figure the review step shows.
Step 2 — GPU
Skipped entirely for a CPU session.
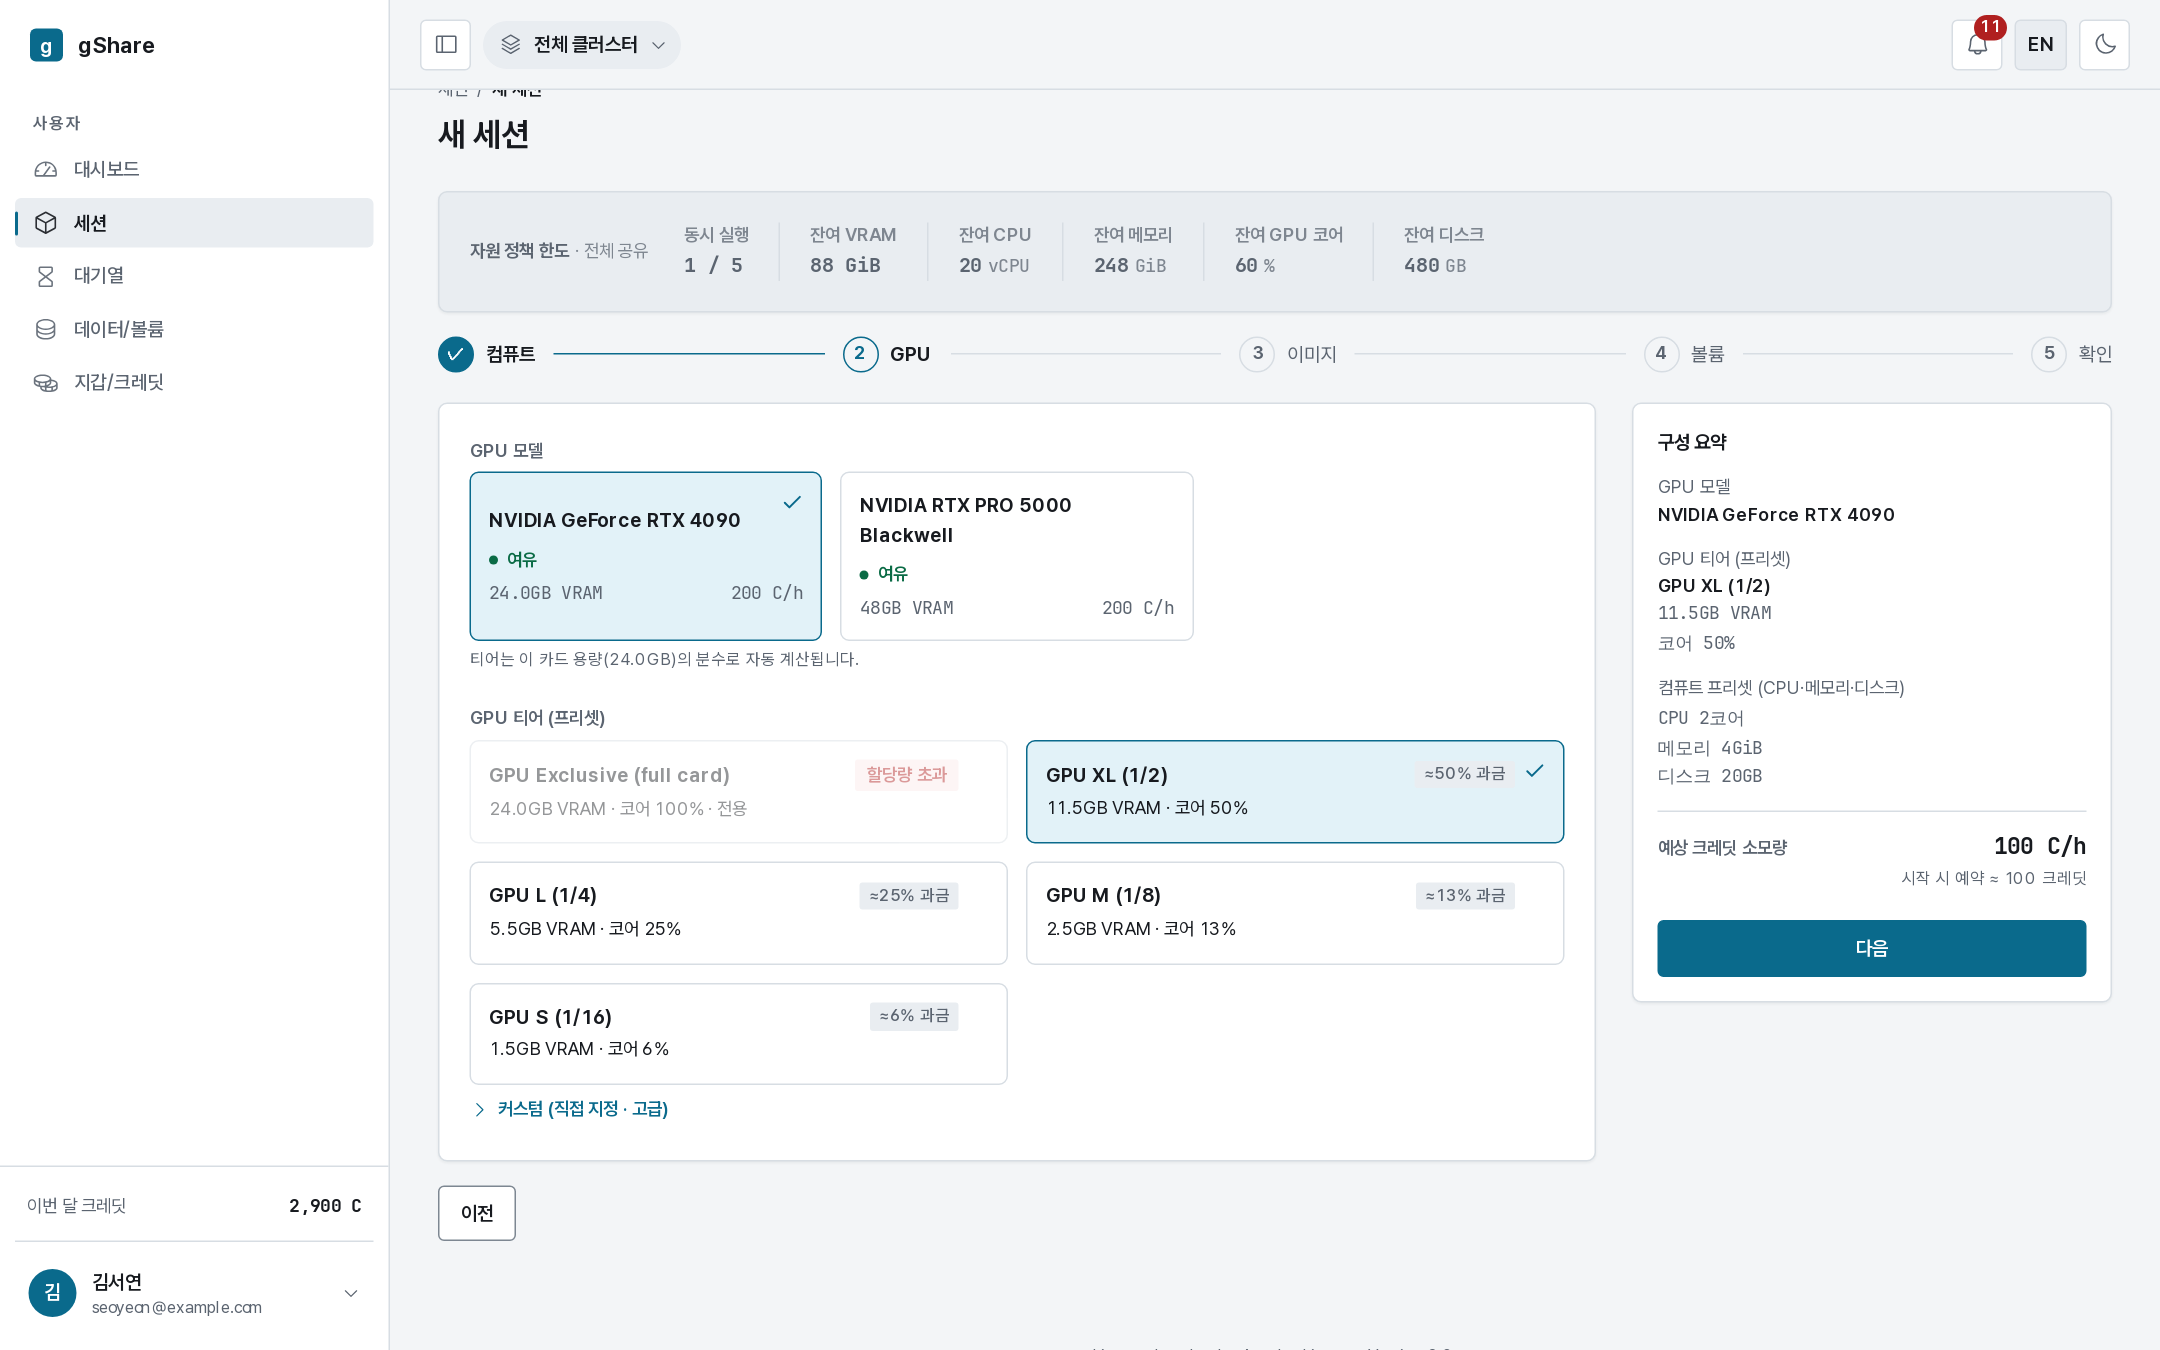
GPU model
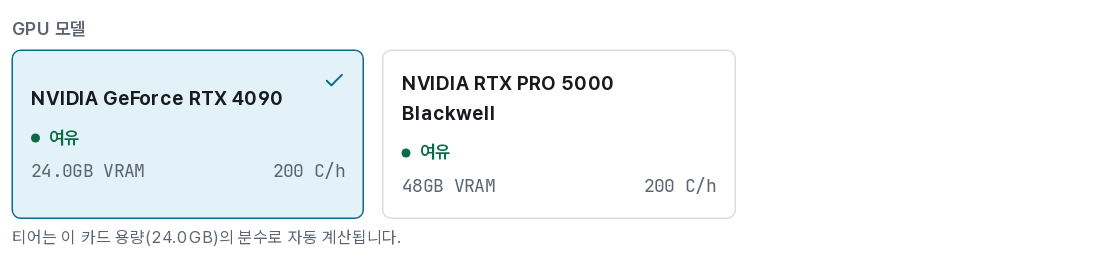
One tile per model in the fleet you are allowed to use, with the whole card's VRAM and the hourly rate for a whole card. A model with no free capacity is still selectable — the session queues instead of failing.
Tier
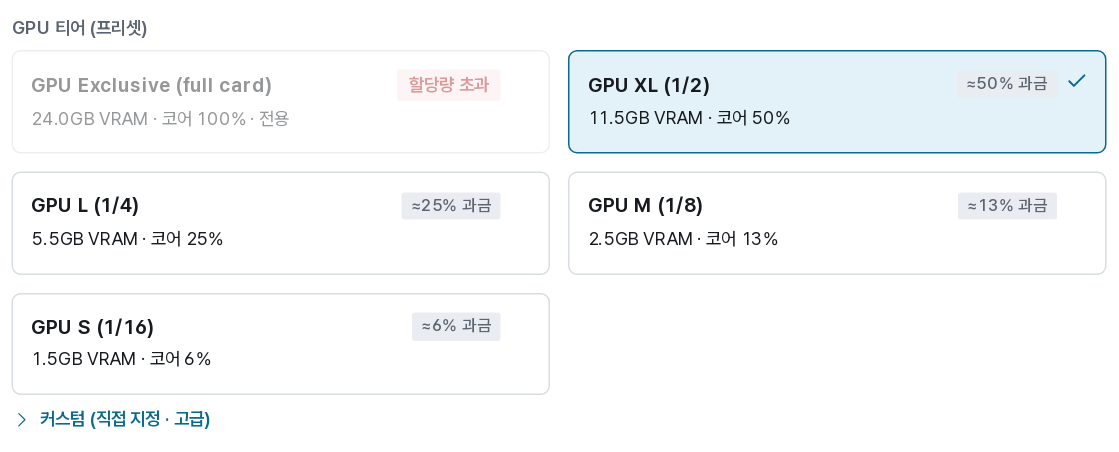
A tier is the fraction of that card you take:
| Tier | Share | On a 24 GB card |
|---|---|---|
| Exclusive | the whole card | 24 GB VRAM · 100% cores |
| XL | ½ | 11.5 GB · 50% |
| L | ¼ | 5.5 GB · 25% |
| M | ⅛ | 2.5 GB · 13% |
| S | 1/16 | 1.5 GB · 6% |
Each tile carries its own status:
- ≈50% billed — the occupancy you pay for:
max(VRAM fraction, core fraction). Half a card costs half the hourly rate. - Will queue — nothing free right now; the session waits instead of starting.
- Over your limit — the tier exceeds what your resource policy leaves you.
- Capacity short / Unavailable — no card of this model can serve that tier (for example, no card is configured for exclusive use).
Occupancy is what you pay for, and a slice you do not use is a slice someone else could have. An eighth of a card costs an eighth of the rate.
Custom (advanced)
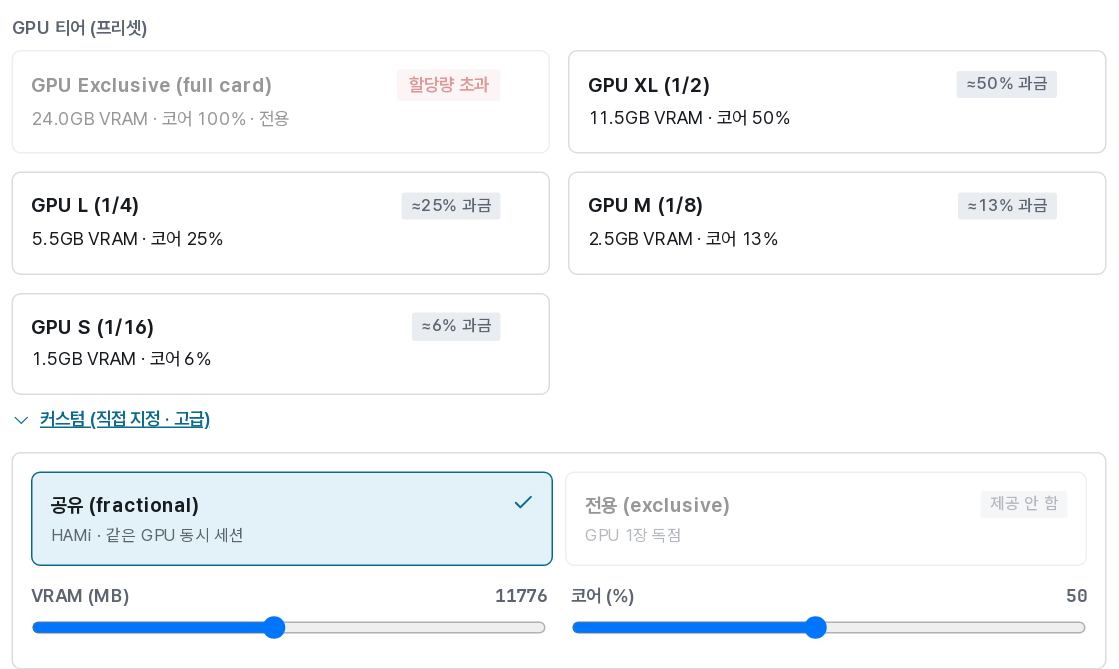
Custom opens the exact controls behind the tiers: shared (fractional) or exclusive, then VRAM in MB and cores in percent. Use it when a model needs, say, 14 GB — between two tiers. The billed occupancy still follows the larger of the two fractions, so asking for 14 GB and 5% cores is billed on the VRAM, not the cores.
Step 3 — Image
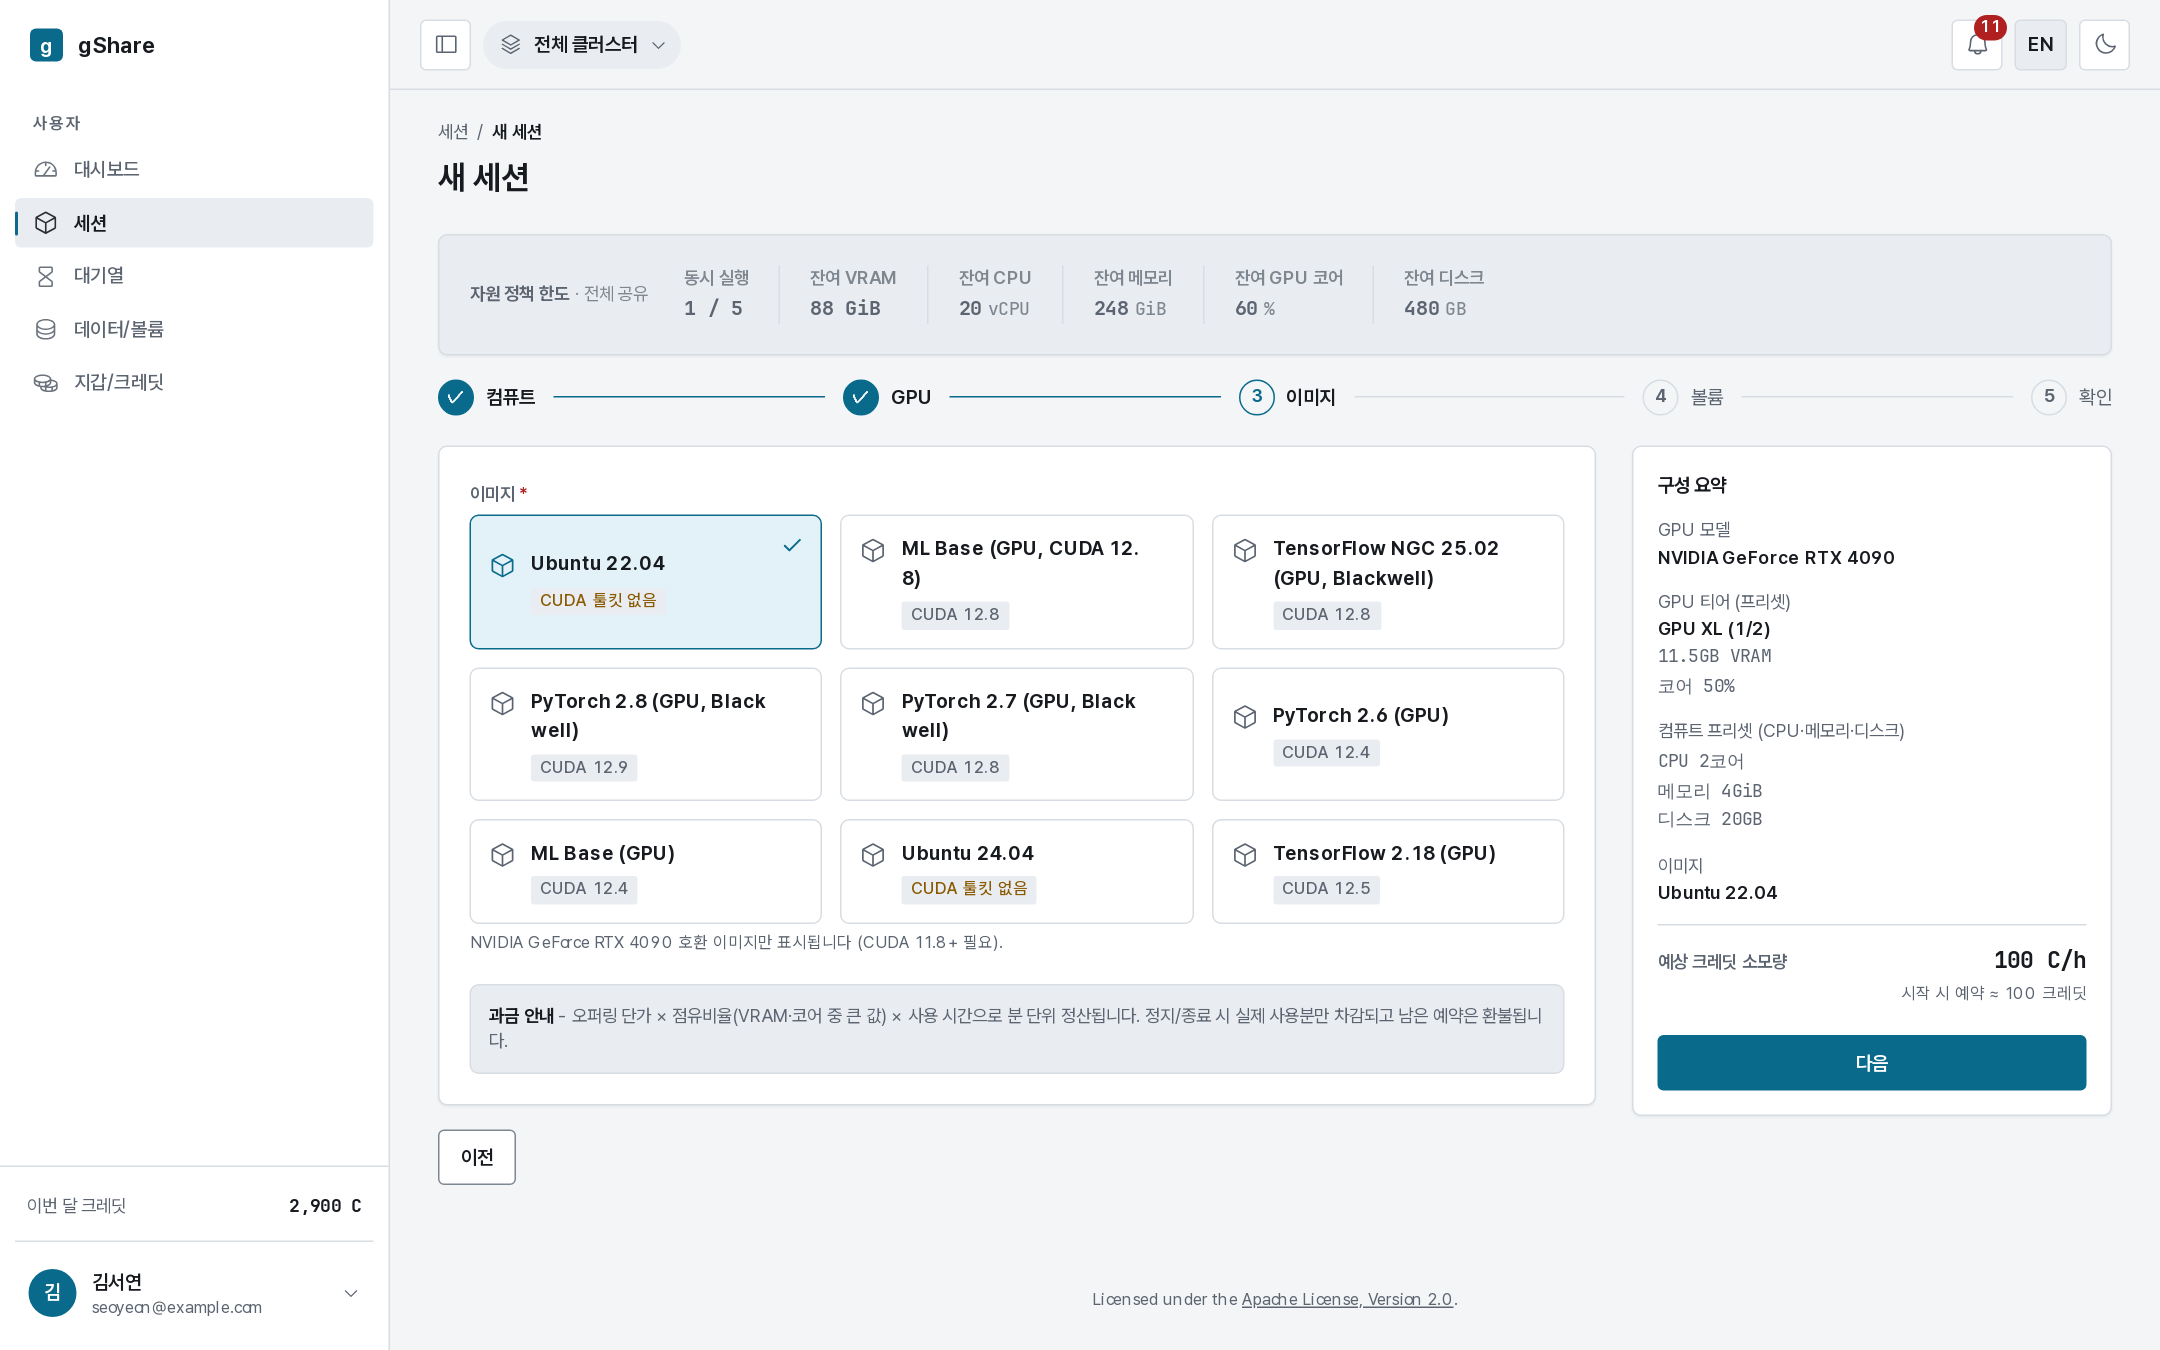
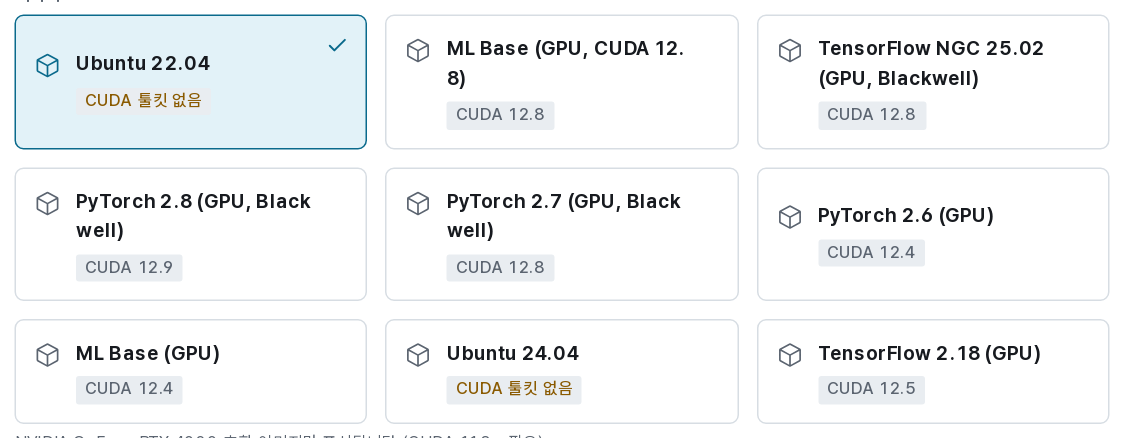
The image is the container the session runs. Only images compatible with the GPU you chose are offered — an image built for CUDA 12.4 does not appear when the card needs 12.8.
The tags on each tile tell you what you are getting:
- CUDA 12.8 — the CUDA runtime inside the image.
- Supported GPUs: 3 — models the administrator verified it on.
- Base image (in amber) — the card is there but the CUDA toolkit is not. The session starts
and
import torchthen fails. Pick a CUDA image unless you intend to install the toolkit yourself.
Images marked My image are ones registered for you alone rather than for everyone; see Images for how the catalog is filled.
Step 4 — Volumes
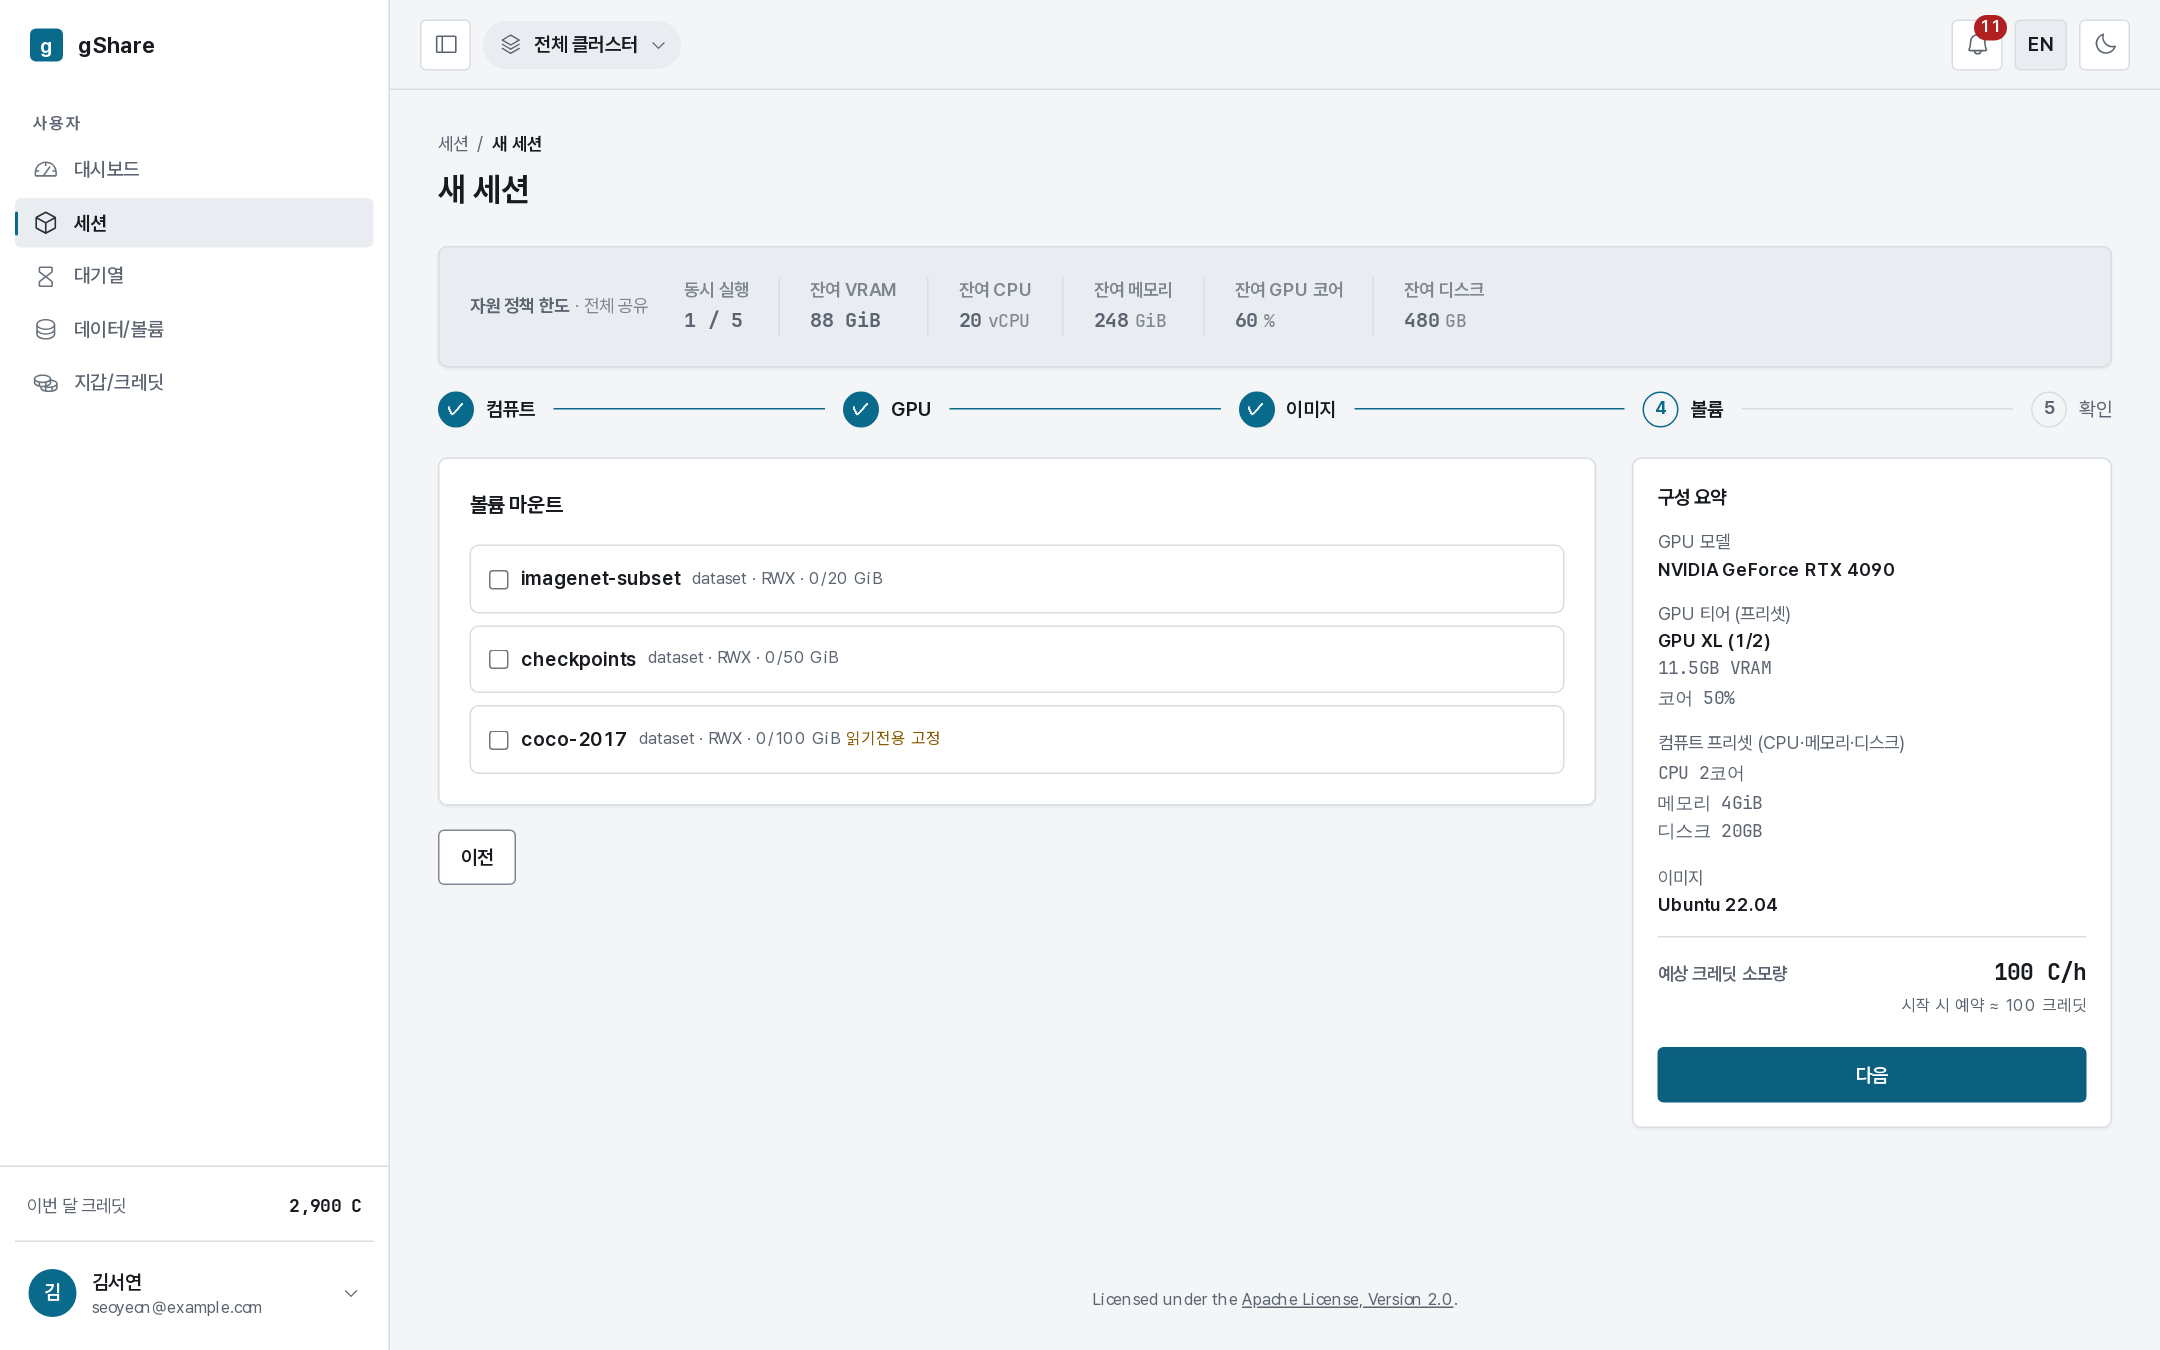
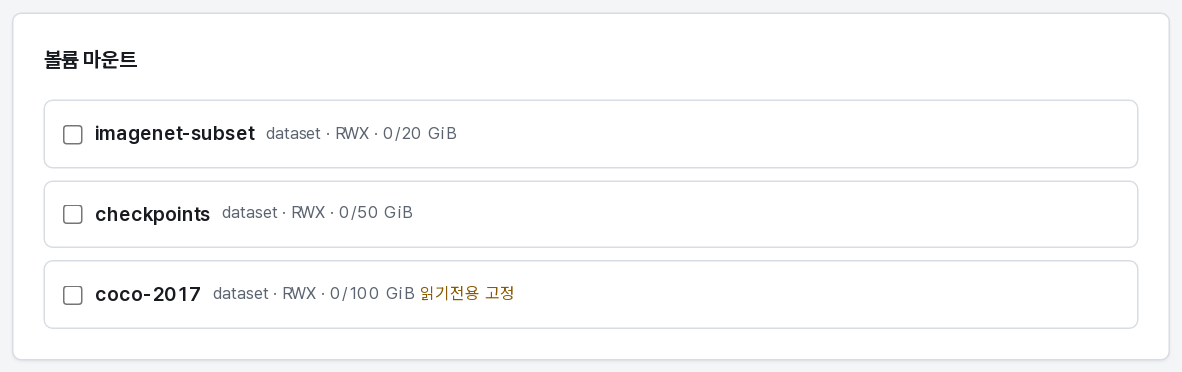
Every volume you own or that has been shared with you is listed, with its type, access mode, and how full it is.
Tick a volume and two controls appear: the mount path and the mode.
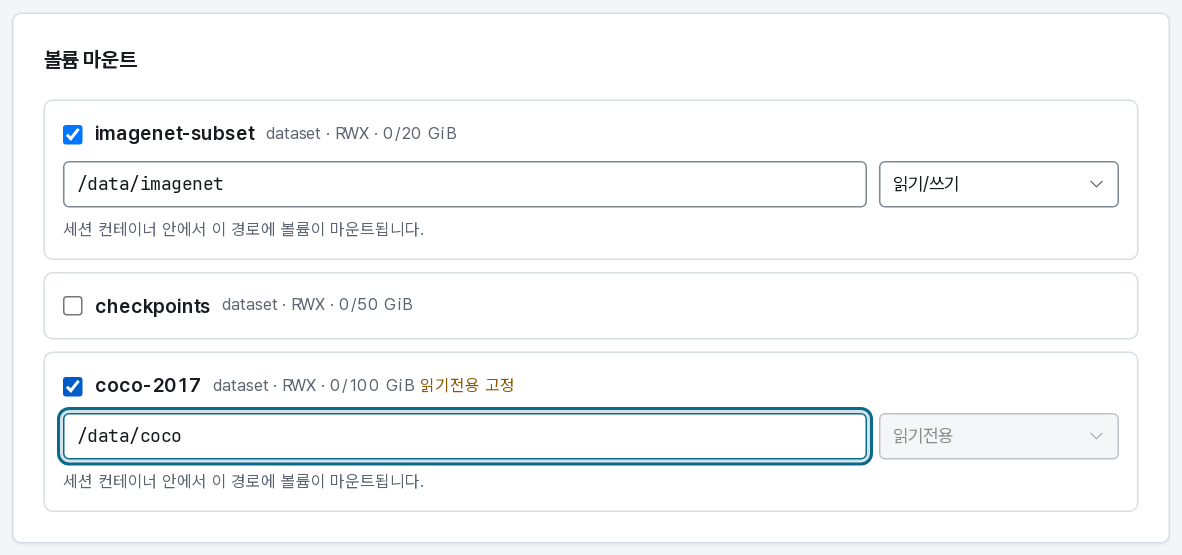
- Mount path — where the volume appears inside the container. The default is
/data/<type>; give each volume its own path (/data/imagenet,/data/coco) so two mounts never land on top of each other. - Mode — read/write or read-only. A volume shared with you read-only is pinned to
read-only and the control is disabled, as
coco-2017is above.
Mount paths that are refused

The path must be absolute and made of plain ASCII segments (A-Z a-z 0-9 . _ -), and it may
not sit on a system directory — /etc, /usr, /bin, /proc, /dev and their children are
refused, because mounting over them would break the container. The wizard says so as you type;
the Next button stays disabled until the path is valid.
Step 5 — Review
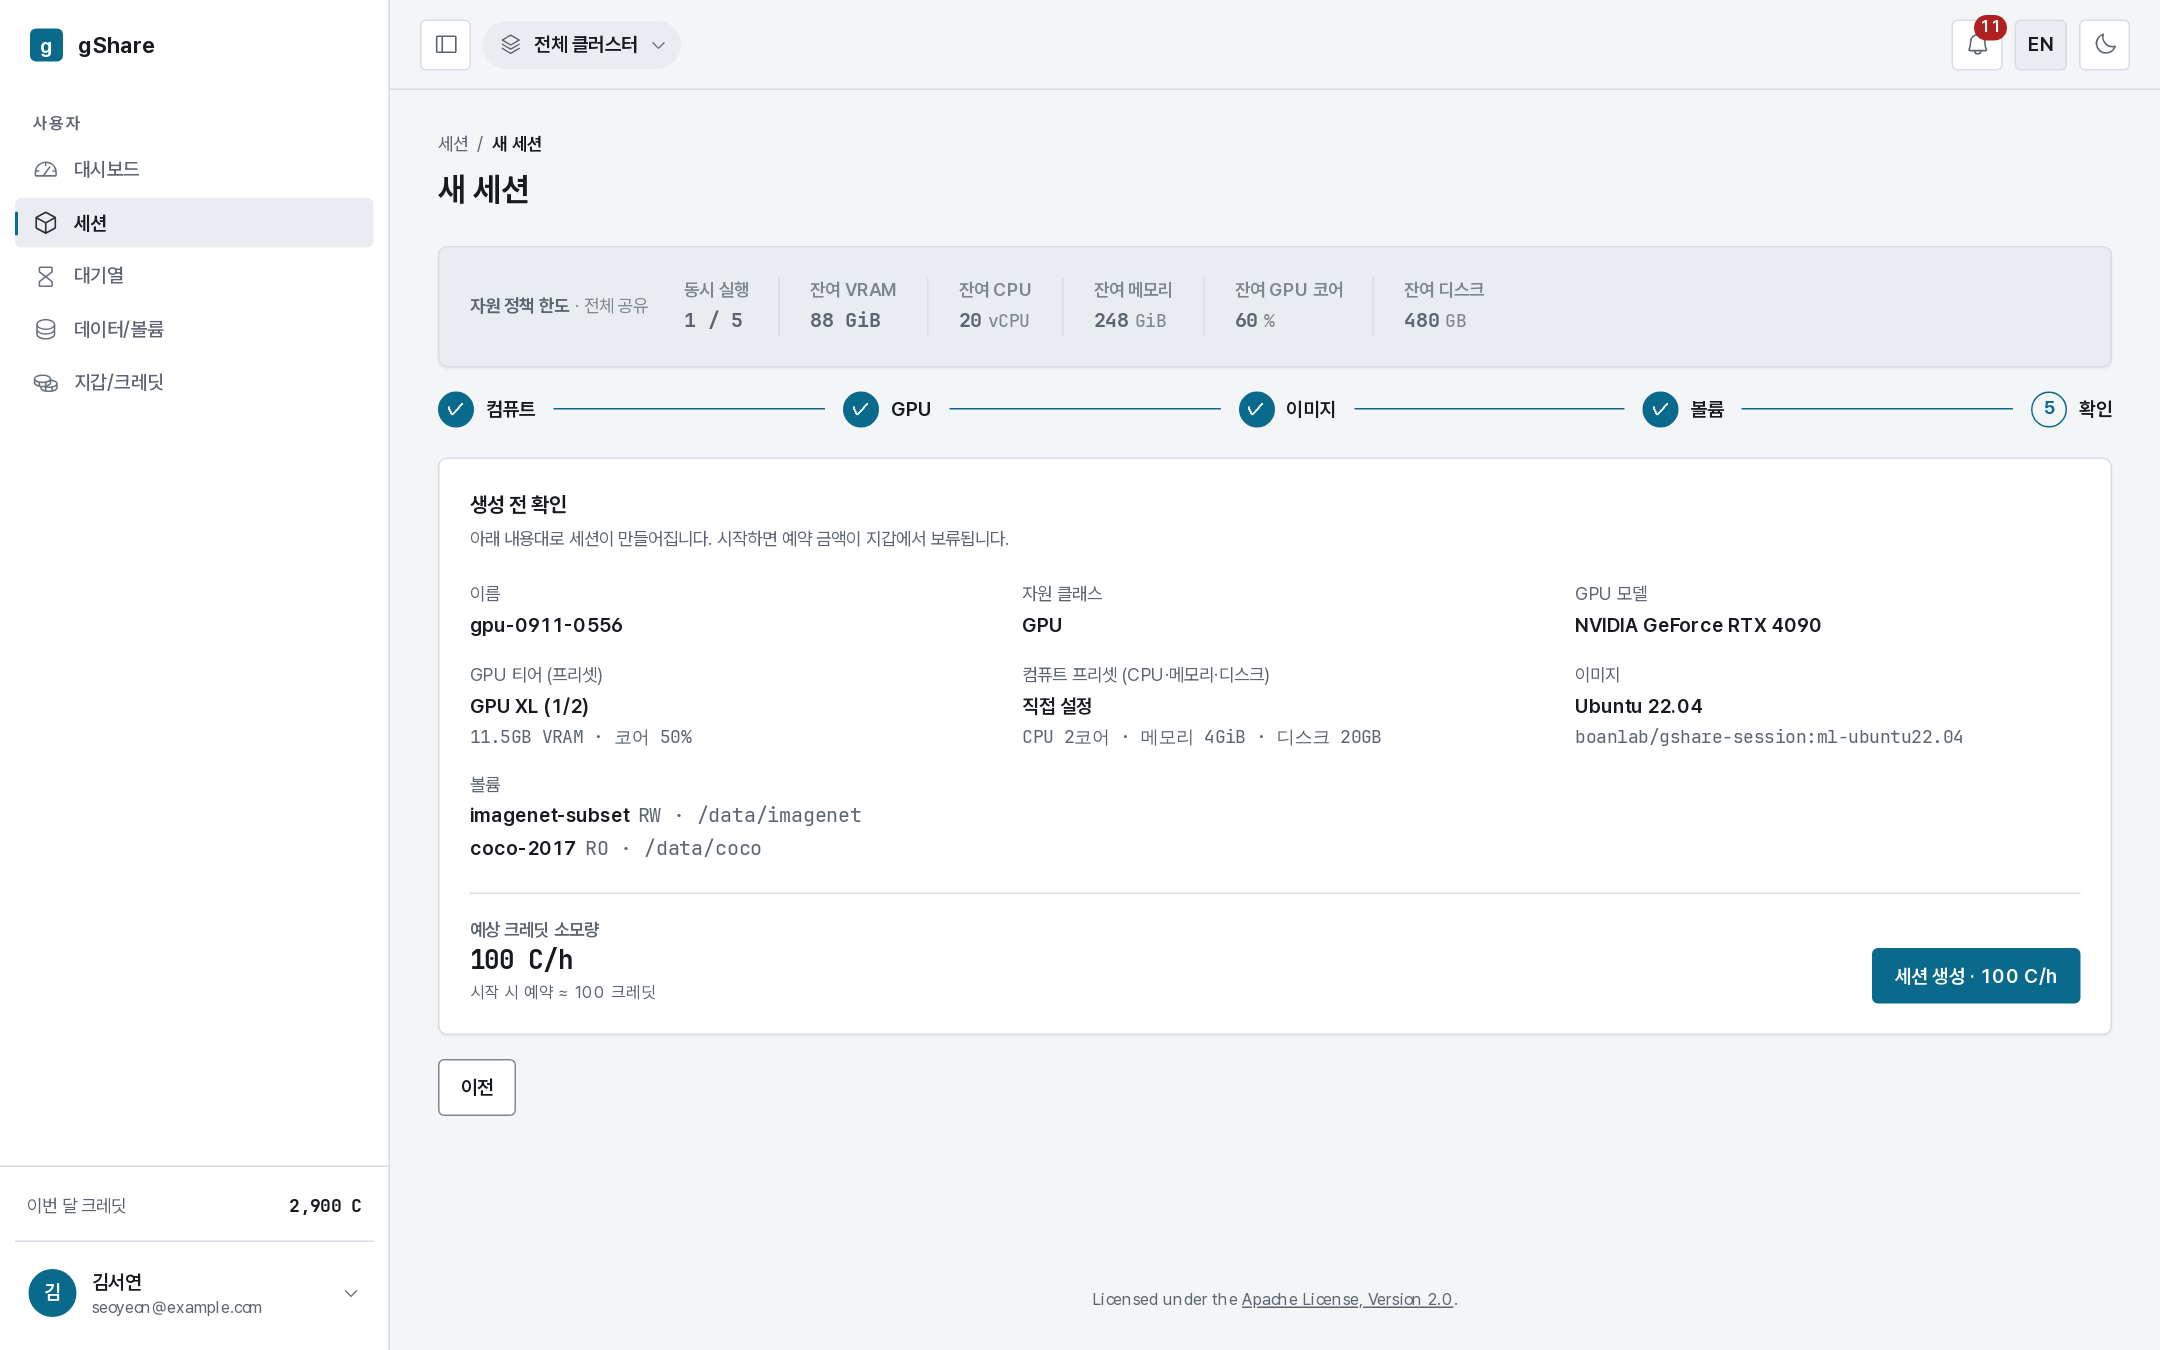
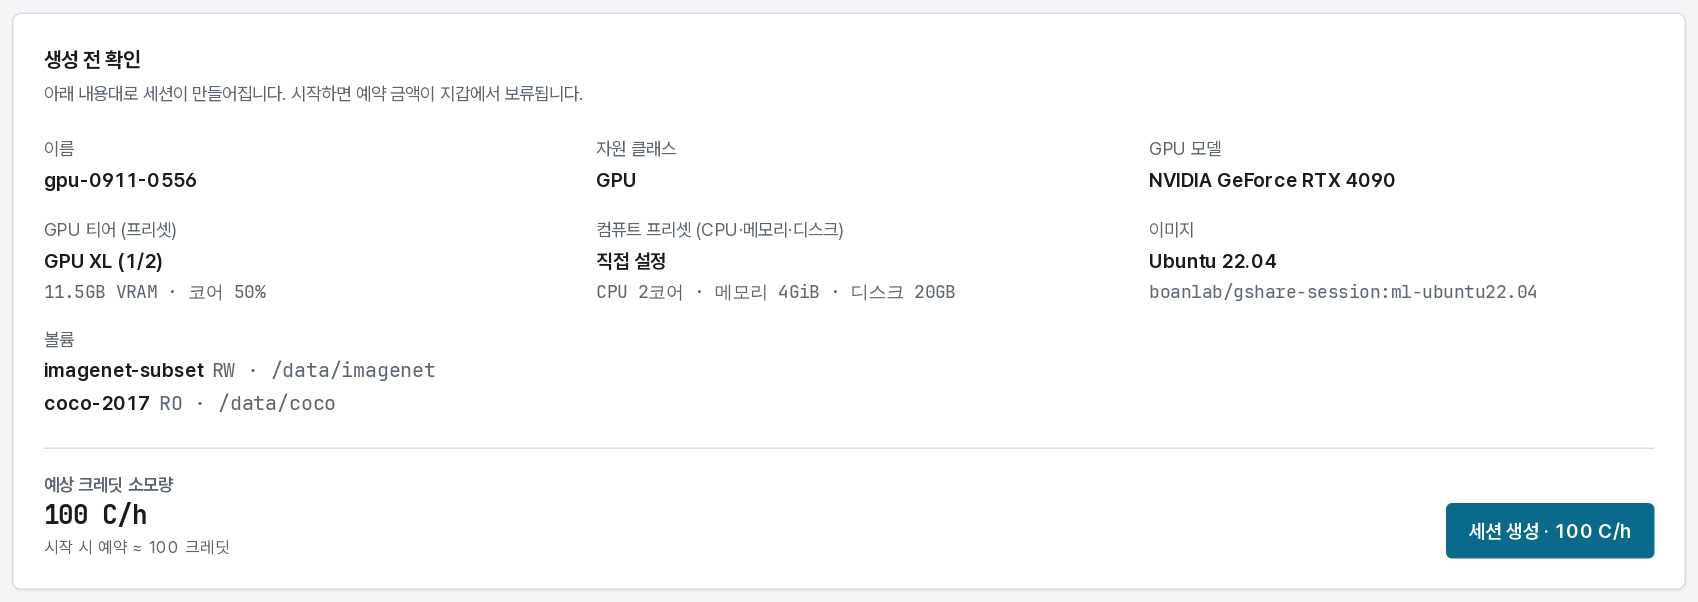
The last screen reads the whole order back: name, class, GPU model and tier, compute preset, image, and each volume with its mode and path — then the price.
- Estimated credits per hour — rate × occupancy. It is a rate, not a total: a session that runs for twenty minutes costs a third of it.
- Held at start — the amount reserved from your wallet when the session starts. It is consumed as the session runs, and whatever is left is refunded when it ends.
Start session is the only button in the wizard that creates anything. What happens next:
- capacity is free → the session goes Pending for a few seconds while the container starts, then Running;
- nothing is free → the session enters the queue and starts by itself when room appears;
- something is out of bounds → the session is refused with a reason (over quota, insufficient credits, an image the card cannot run), and nothing is charged.